2. Editing with Tina
In this starter, editing is done in a separate page from your production pages.
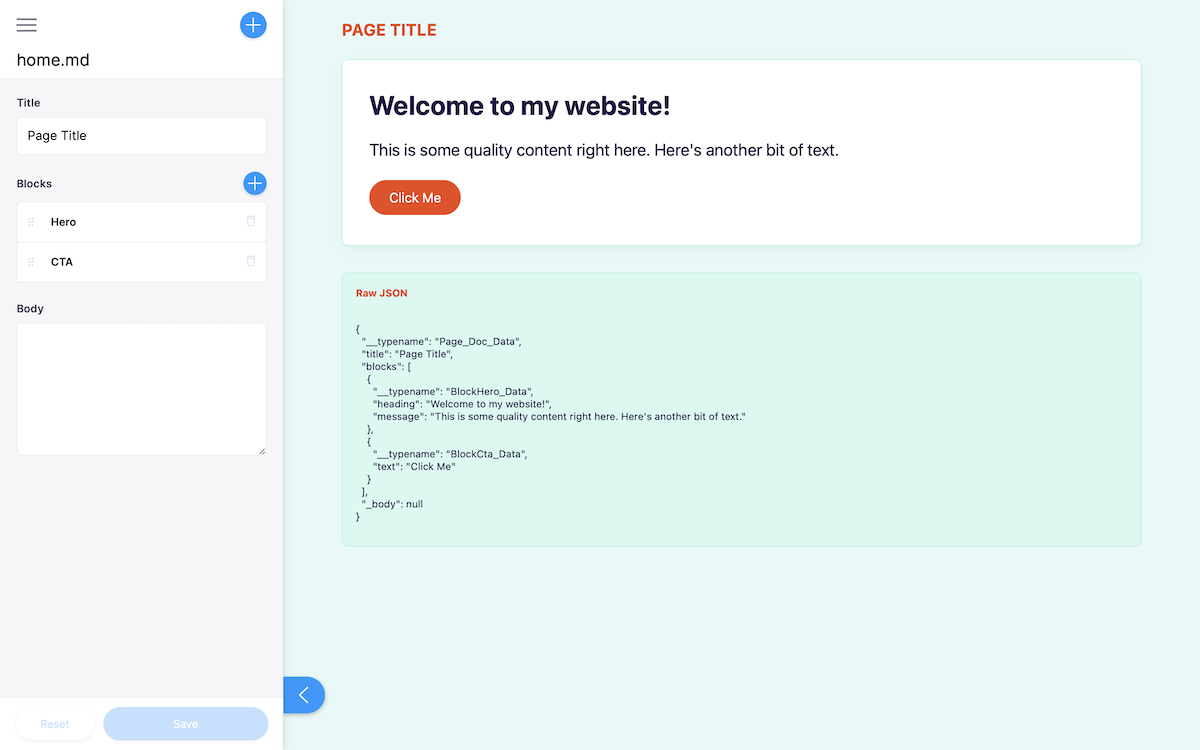
Let's take a sneak peek at the editing UI by navigating to the /admin route. The page looks the same as your production page, but you can notice a pencil icon at the bottom left corner.
Click on the pencil icon to open Tina's sidebar. You will see a form with fields in which you can edit, and see updates live on the page. Since we're working locally, clicking save will result in changes to your local filesystem.

You are now making edits on your site with Tina! But.. we're still missing a few things:
- We want to host our new site, so that the world can experience its beauty
- We want only OUR editors to be able to make edits on the hosted site.
Tina has the ability to hook into multiple backends, but for this tutorial, we are going to set up Tina Cloud.